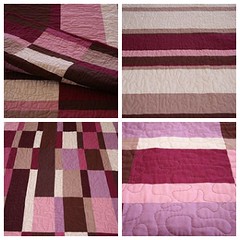
The quilt book said that the quilting was to homogenise the overall colour design. I didn't particullarly believe them at the time but to me, there is a definite difference between this and this. I am glad I picked the duller purple colour to quilt in, rather that the red colour that is used for the edging. It ties it all together very well.
Some lessons learnt:
1) It is definately easier to do a single colour. This was only about 10 hours of quilting time instead of the 30 or so it took to do the last one. Unwaxed cotton also produces a much better effect - no more pulling on the curves on the underside, which was good as I want to use this as a doublesided quilt.
2) Paul and I worked out a nifty way to roll on the material so that it goes on the rollers nice and even. Because of the length, the middle tends to wind looser than the ends, and by introducing drag in the middle (a bit difficult to explain here but I can show you in person) we got the quilt on the rollers evenly. This made it much to get the lines nice and straight when I quilted.
3) Stop occasionally and tighten up all the screws on your sewing machine when you are doing lots of quilting - I didn't do this and the pressure foot came loose and the needle whacked into it and the result was this plus a rather annoying hole (now fixed) in my quilt.
4) I did some practice quilting before starting this one proper, and I realised pretty quickly that you have to do a motion that you can sustain consistenly over a large area. My quilting is much more curvy that the suggested design (which is kinda long stippling, rather than curvy) but I could do it consistently over the whole quilt, and I still like the effect.
5) As you roll more quilt onto the rollers, the working area (between the needle and rollers) gets ridiculously small (e.g. by the end, it was about 7 cm). To try to work around this without a lot of starting and stopping, I tried stopping the machine with the needle IN the quilt and moving the rollers with the needle down. Works OK - you need to have a bit of prior planning to ensure you stop it somewhere useful, and it's much better if you remember where you were going with the quilting when you restart, as otherwise you end up going somewhere strange and not continuing the previous line - which looks a bit dorky. I did get a couple of things like this from the restart, but all in all, not a bad technique.
Ok, now I am going to go lie down.
¶ 11:51 AM 0 comments
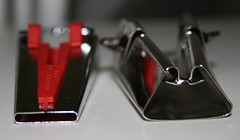
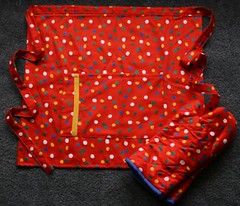
As I don't have the patient of DJ Bebe when it comes to working with little strips of material and a hot iron, I have invested in several widths of bias binding makers.
The bias binding maker on the left is a Clover brand bias binding maker and it is far superior to the one on the right. The smaller hole for the exit means you don't have to hold strips down to get the correct folds - the tool holds the folds in for you. This makes the whole process of making binding much faster and you can keep your hands away from the iron.
I hadn't seen them before the craft show at the weekend, but they are definatly worth looking out for. I may have to upgrade my big bias binding maker next time I see them!
¶ 9:02 PM 1 comments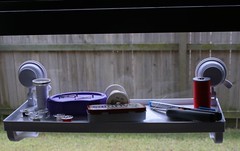
The great thing about this is I can move it from the window in my room to the window out where my quilter is and keep all my bits and bobs in one place.
¶ 8:50 PM 0 comments
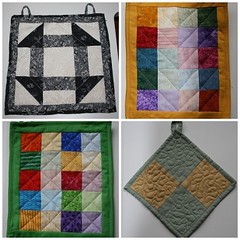
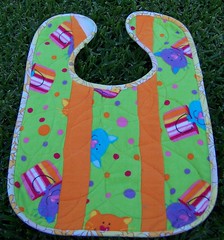
I have had these baby quilts on my list of things to do for months now and I finally got these all finished today. Each is a small sample of the materials (but not necessarily the design in these cases) of big quilts I have made.
The black and white one, is obviously, the black and white quilt, and the two coloured ones are made out of the materials I made the two circle quilts out of. The green and yellow is backing material for my mother's indian quilt - I couldn't cut out bits of the main panel for this, so the backing material has to do!
Now, all I have to do is put up a bunch more sticky hooks on my walls...
¶ 8:44 PM 1 comments
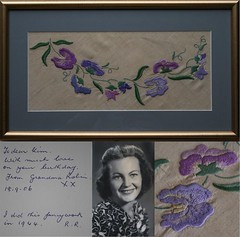
The embroidery you see here is one of two pieces my grandmother Robin got framed (the other going to my cousin Anna, also for her 30th birthday). Each piece is actually 1 corner of a linen tablecloth that Grandma started in 1944 before she go married - she did 2 of 4 corners and never finished them. When she showed me, I thought it would be a waste if this beautiful hand embroidery was never viewed (which was definately the case when it was a 1/2 complete tablecloth). So after about 2 years of nagging, Grandma suprised me with it for my birthday!
The photo is of Robin about the age when she did it.
¶ 10:39 AM 0 comments
Well, week 2 of Sponky's crafty holiday was as productive as week 1. Summer wardrobe was the main focus of this week and I was able to complete:
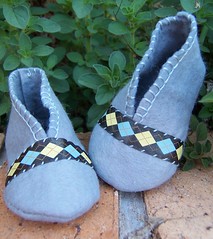
- 2 drawstring skirts (here and here). These are basically big sacks that I can get over my hips, with a drawstring made of the same material. Very quick and easy and good for days when I am lazying around the house or at the beach
- 2 wrap-around shirts (here and here). These are made with McCalls pattern 4384, altered to be slightly longer in the waist to account for the fact I am not 5 foot 7. I originally thought the ties at the front where too fat, but they are actually a good width when you go to tie them. I also like the gathering on the fron yoke (you may or may not be able to see it in the pictures. Will have to see how the V neck goes in real life!
- I have also ALMOST completed 3 small quilts (well, tiny quilts) to go on my wall (made to document some of the materials I have used in existing quilts). These need binding (and I can't find an 18mm binding maker) so will post some shots when I get to these.
¶ 1:02 PM 0 comments
¶ 12:42 PM 0 comments
¶ 1:23 PM 0 comments
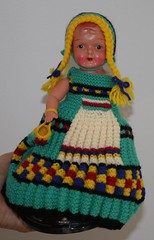
P.S. My mother loves this thing. I'm sorry that I don't, Mum.
¶ 5:44 PM 0 comments
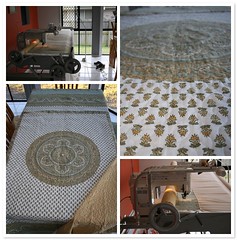
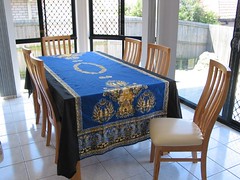
(Well done in the sense that all the threads need tying off and the edge needs doing, but DONE mostly). It's queen-sized, and has a summer weight batting in it so my parents can use it in summer. The centre panel was a piece of material my mother got in India many years ago, and we added some sheet material (yes I know, cardinal sin) on the edge, and also as the backing.
Some lessons learnt
1) While the Gutterman site says you can use the waxed thread in your machine (and you can) it tends to require a very high tension on the needle, and has the unfortunate habit of making a big knot when you run out of bobbin thread, rather than having the thread just spool out. It is nice and shiny though, so if you want that effect, it's quite good.
2) You should pull the bobbin threads through to the top. Otherwise, they get sewn over and get knotted up etc.
3) Change your needle every 4 hours
4) Wind on a couple of bobbins at a time as you go through thread faster than you would think!
5) If possible, I would cut down the backing and batting ALOT more than I did on this one. The ends of the frame are the only place practical to change threads etc, and it would be much easier to do if there wasn't material in the way when I was doing it.
The frame in itself is excellent, and works as designed very well. No pinning required - although it could be worth putting some weights on the batting for the last 1/2 a meter or so as gravity no longer pulls it flat.
The major frustration I suffered on this was not having a sewing machine to do bits and pieces on while my machine was in the frame. If I was doing ALOT of quilting, I would seriously consider a 2nd machine to stay on the fram permanently.
¶ 5:41 PM 0 comments
